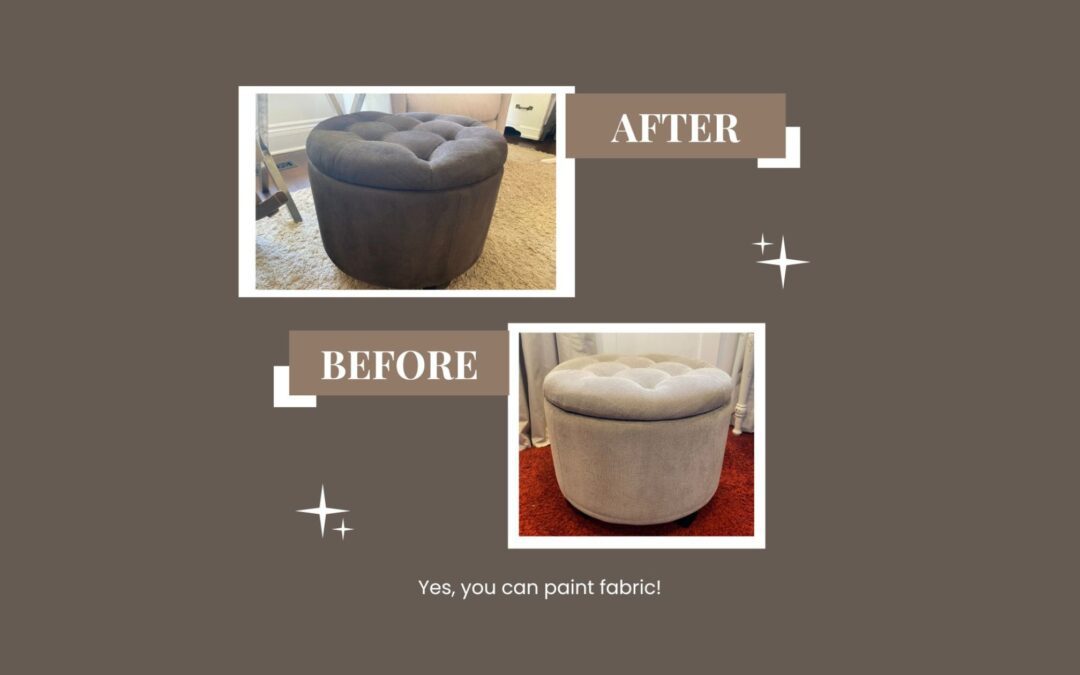
Wow, it has been forever since I busted out a “Makeover Monday” post—like, 2018 forever! But this little update was just too easy (and too satisfying) not to share. So I’m blowing the dust off that old hashtag and bringing it back in style.
Like most families, we’re always on the hunt for more storage. So when we bought footstools years ago, I made the smart choice to get ones that doubled as storage. Fast-forward a few years (and several painting projects later), and those once-functional footstools were looking… well, let’s just say “not on theme” anymore. If you’ve followed along, you know I went on a painting spree last year, freshening up the main level of the house. The vibe has definitely changed!
So instead of buying all new footstools (ugh, why does replacing perfectly functional things feel so wrong?), I used my inner DIYer and gave them a glow-up with paint. Yep, painted fabric. And before you panic, it’s way easier than it sounds.
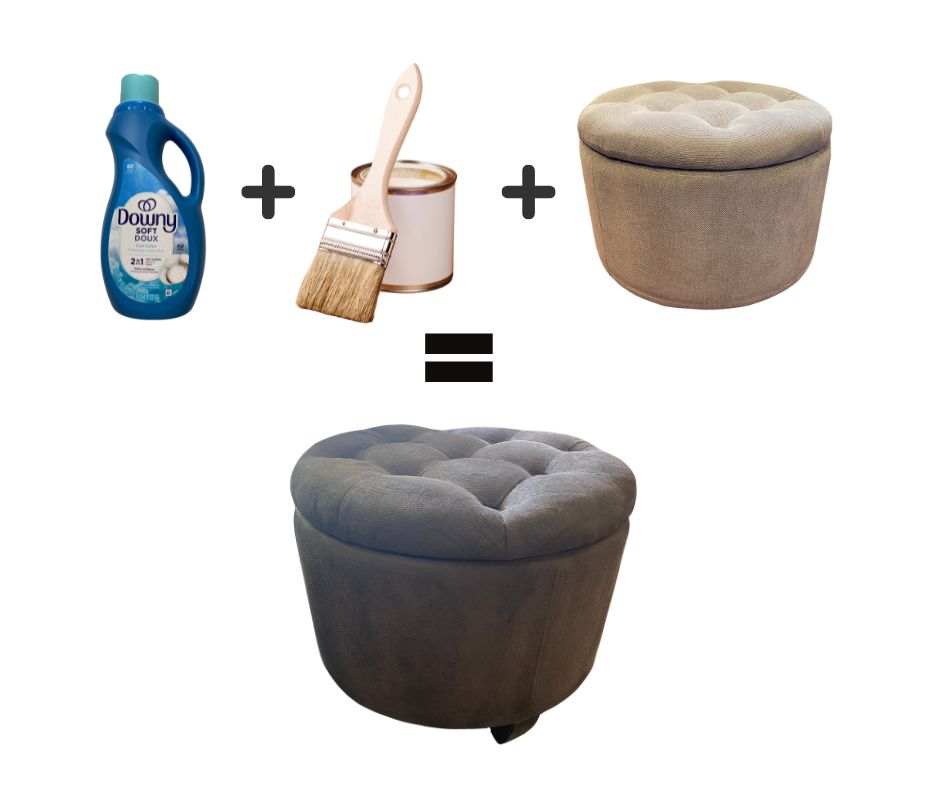
Here’s the magic formula:
Mix equal parts paint and fabric softener, then thin it with water until it’s a smooth, brushable consistency. Dampen the fabric (I used the mister we keep handy as an anti-dog barking too), then brush on the paint. Let it dry overnight, do a quick touch-up the next day, and voilà! One of my kids even said it smelled amazing. Thanks, fabric softener!
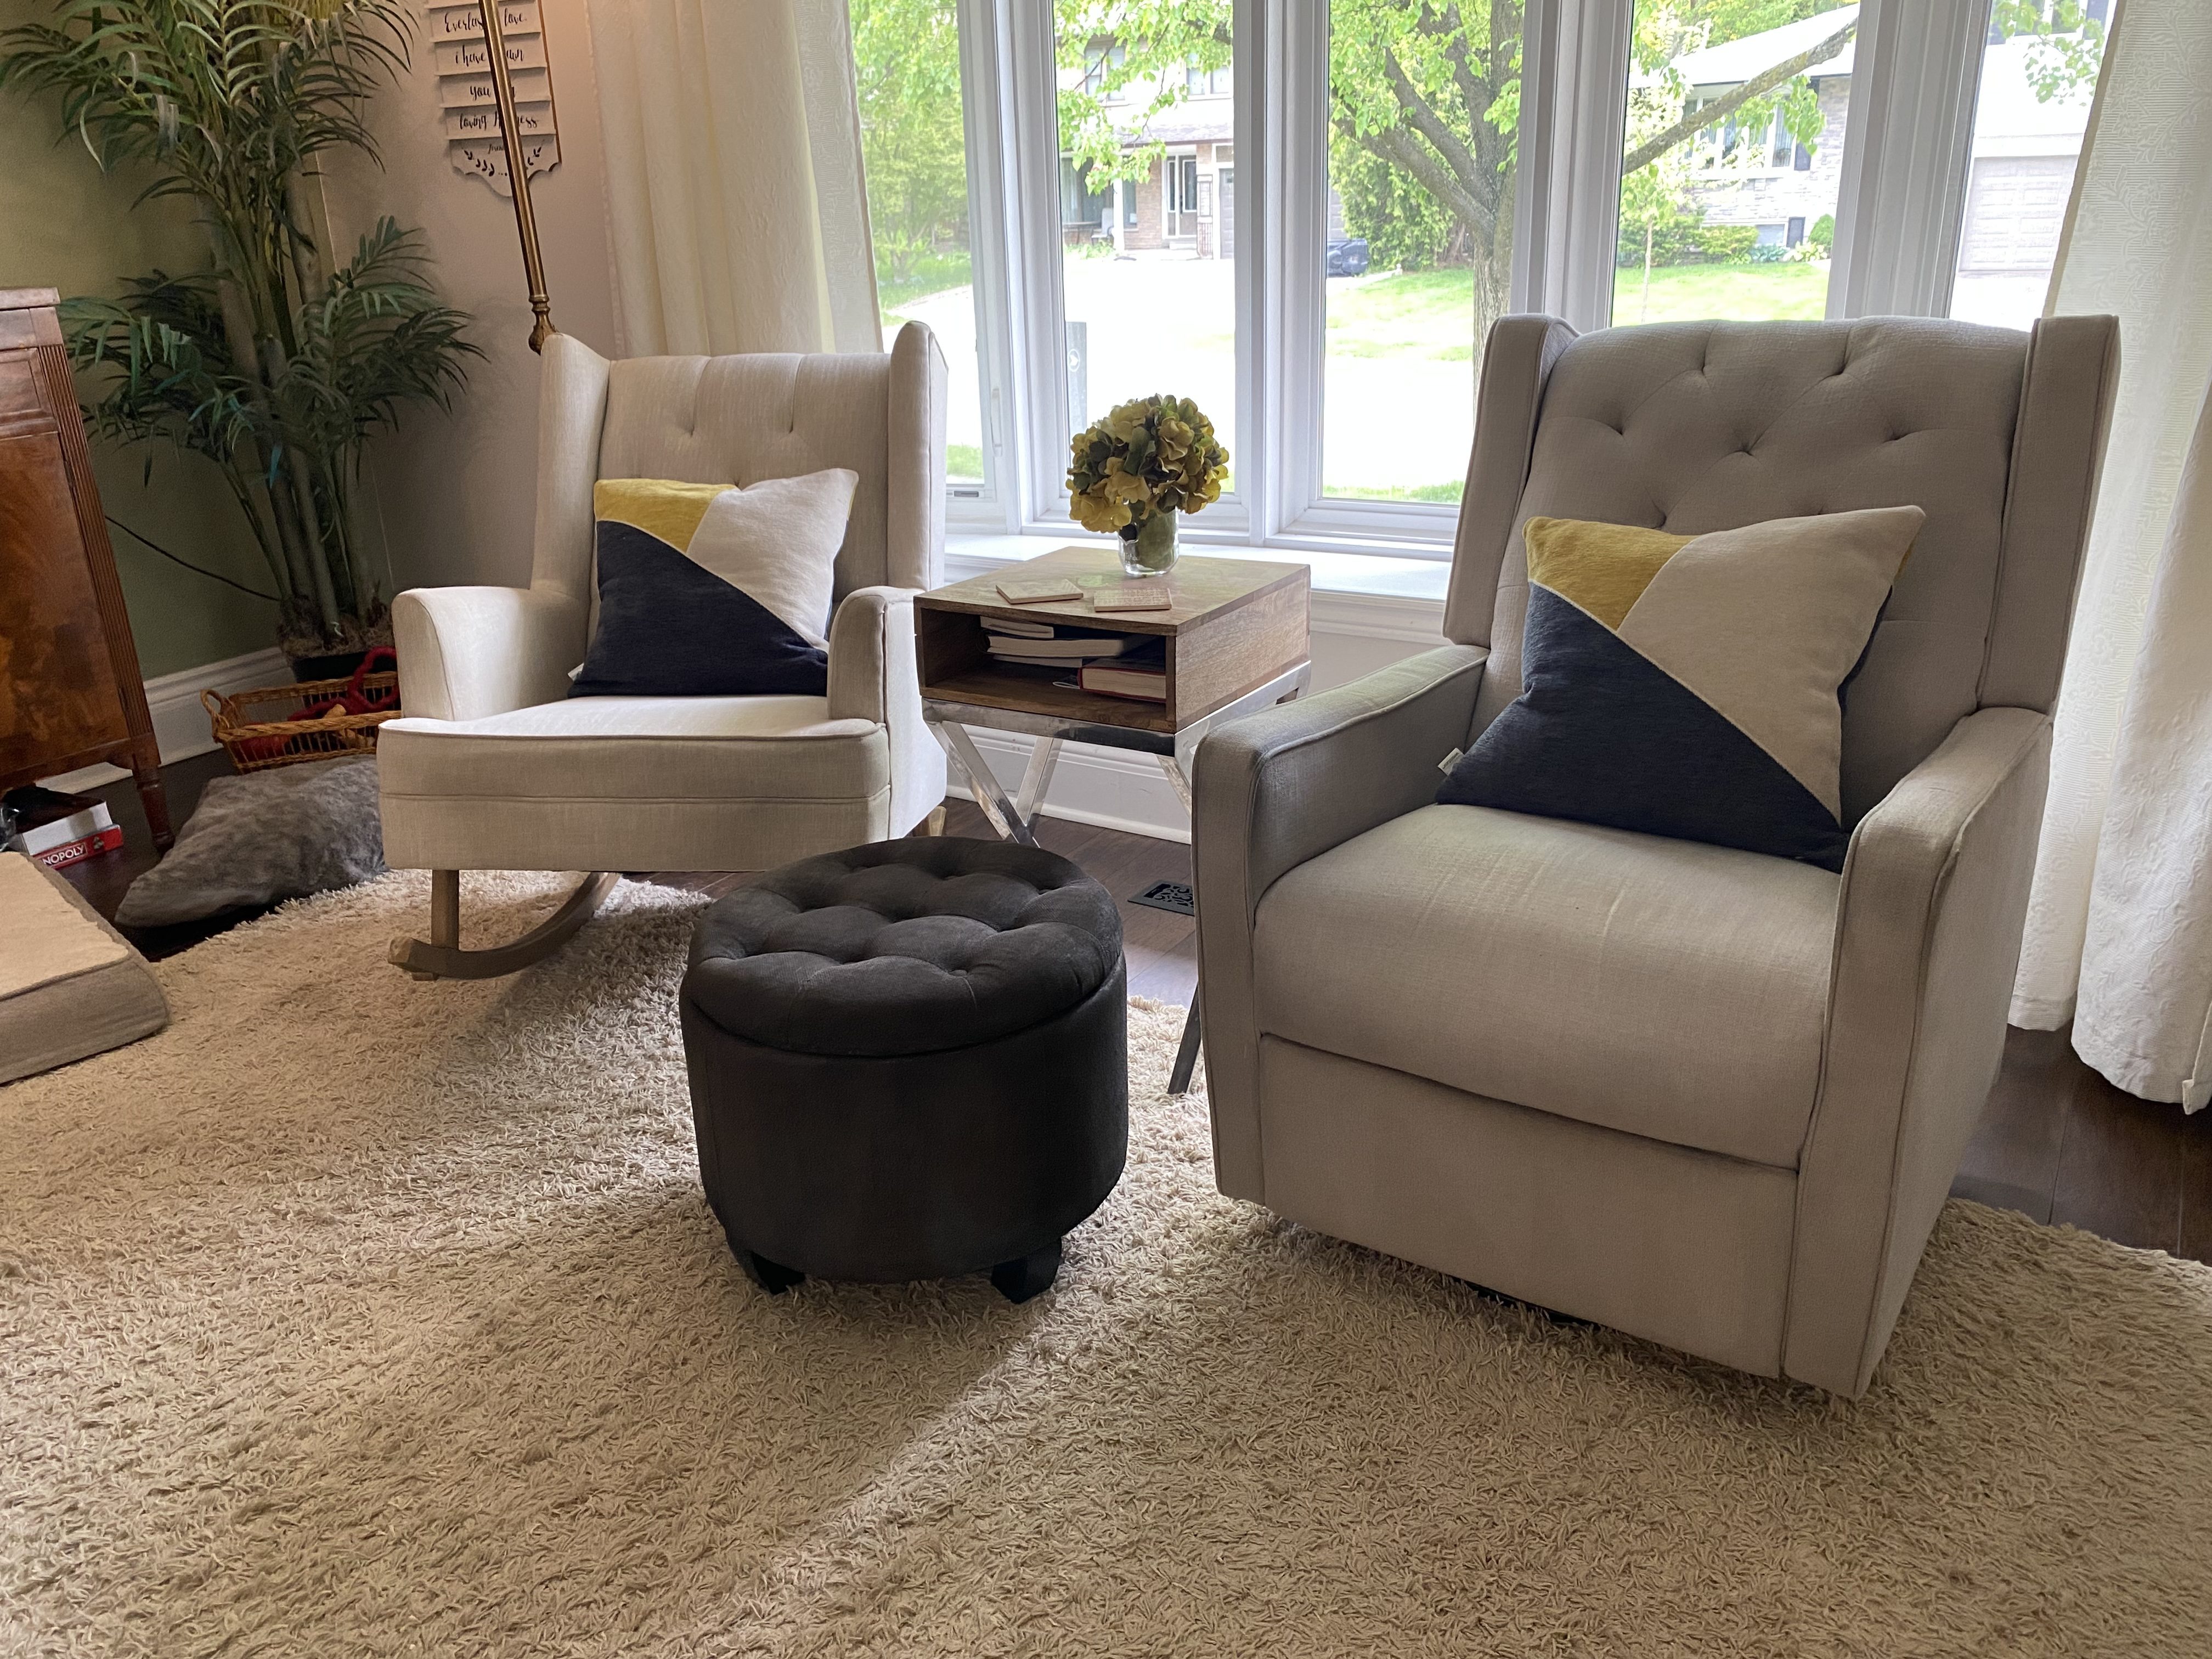
Not bad for a bit of leftover paint and a bottle of fabric softener. This was just one of three footstools getting the spring refresh treatment, so stay tuned. Makeover Monday is officially back, baby.
Have you ever painting fabric? How did it turn out?
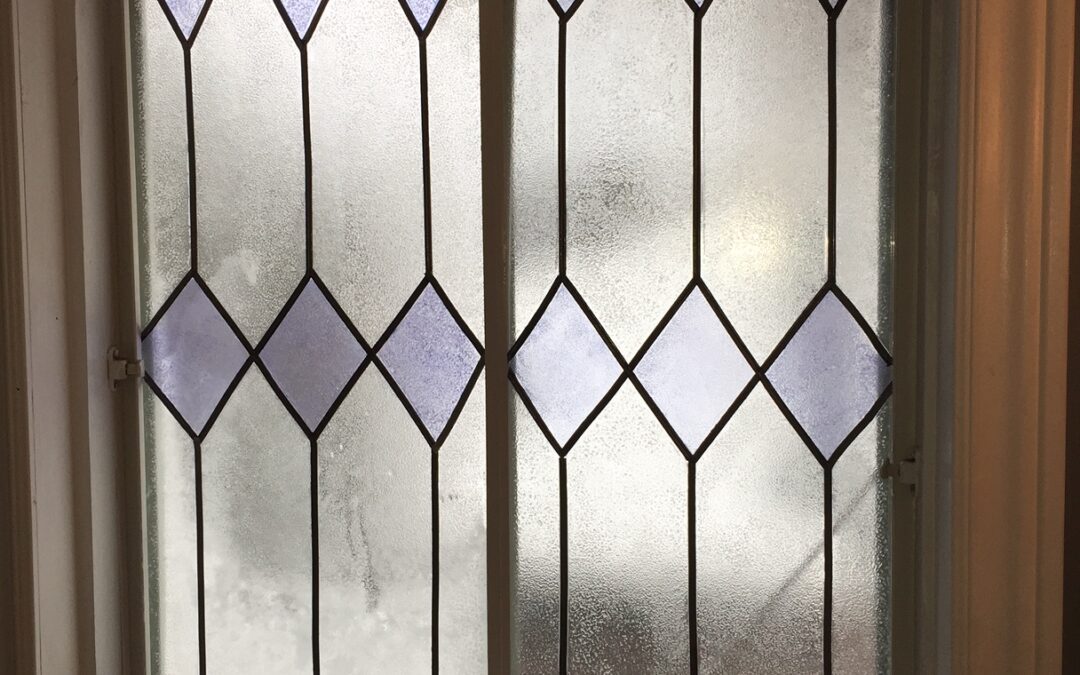
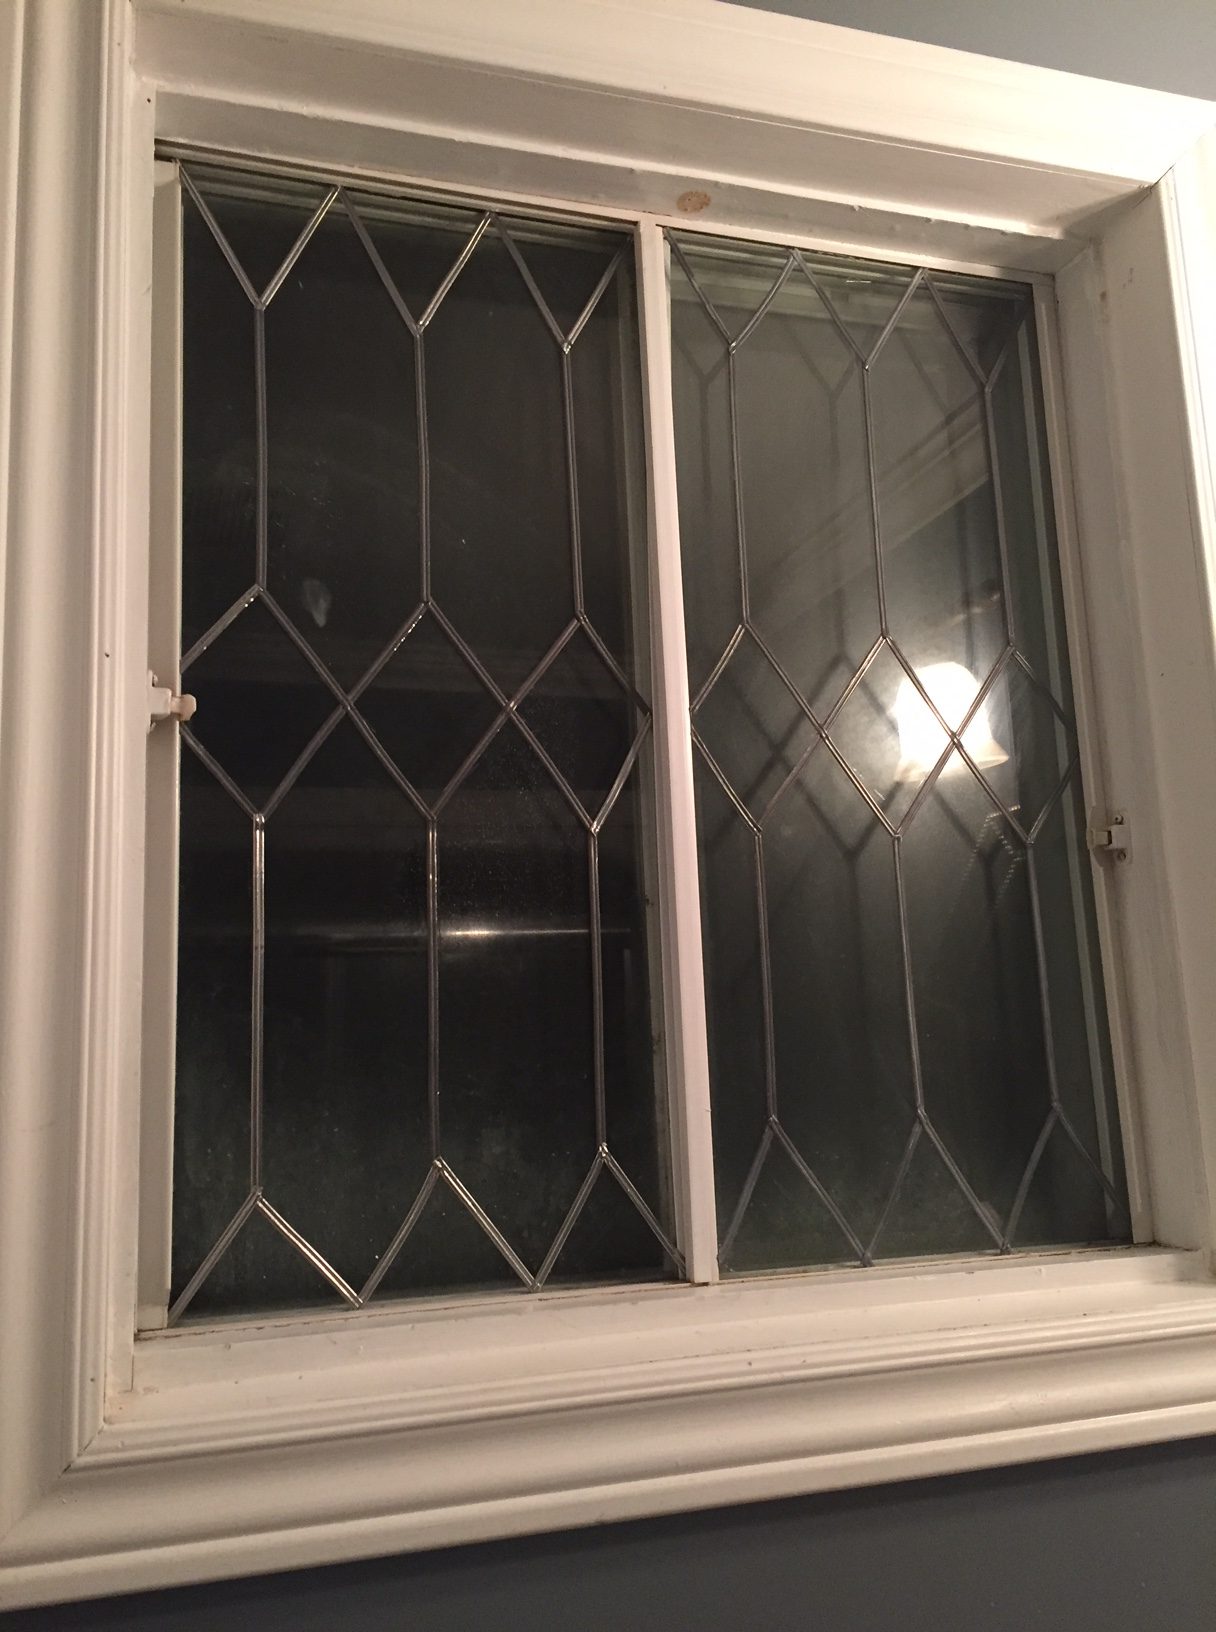
Many of you are already aware of my love for leaded glass. I hang old windows in place of pictures and make faux leaded glass.
I love leaded glass, and I do not want to cover it with curtains. So, when I added leaded glass to our bathroom window, I had a dilemma. Either curtain it or stain the glass. I do favour the plain leaded glass with no colour, but a bathroom needs privacy, and that trumps design. I followed the instructions on a previous post and created this design.
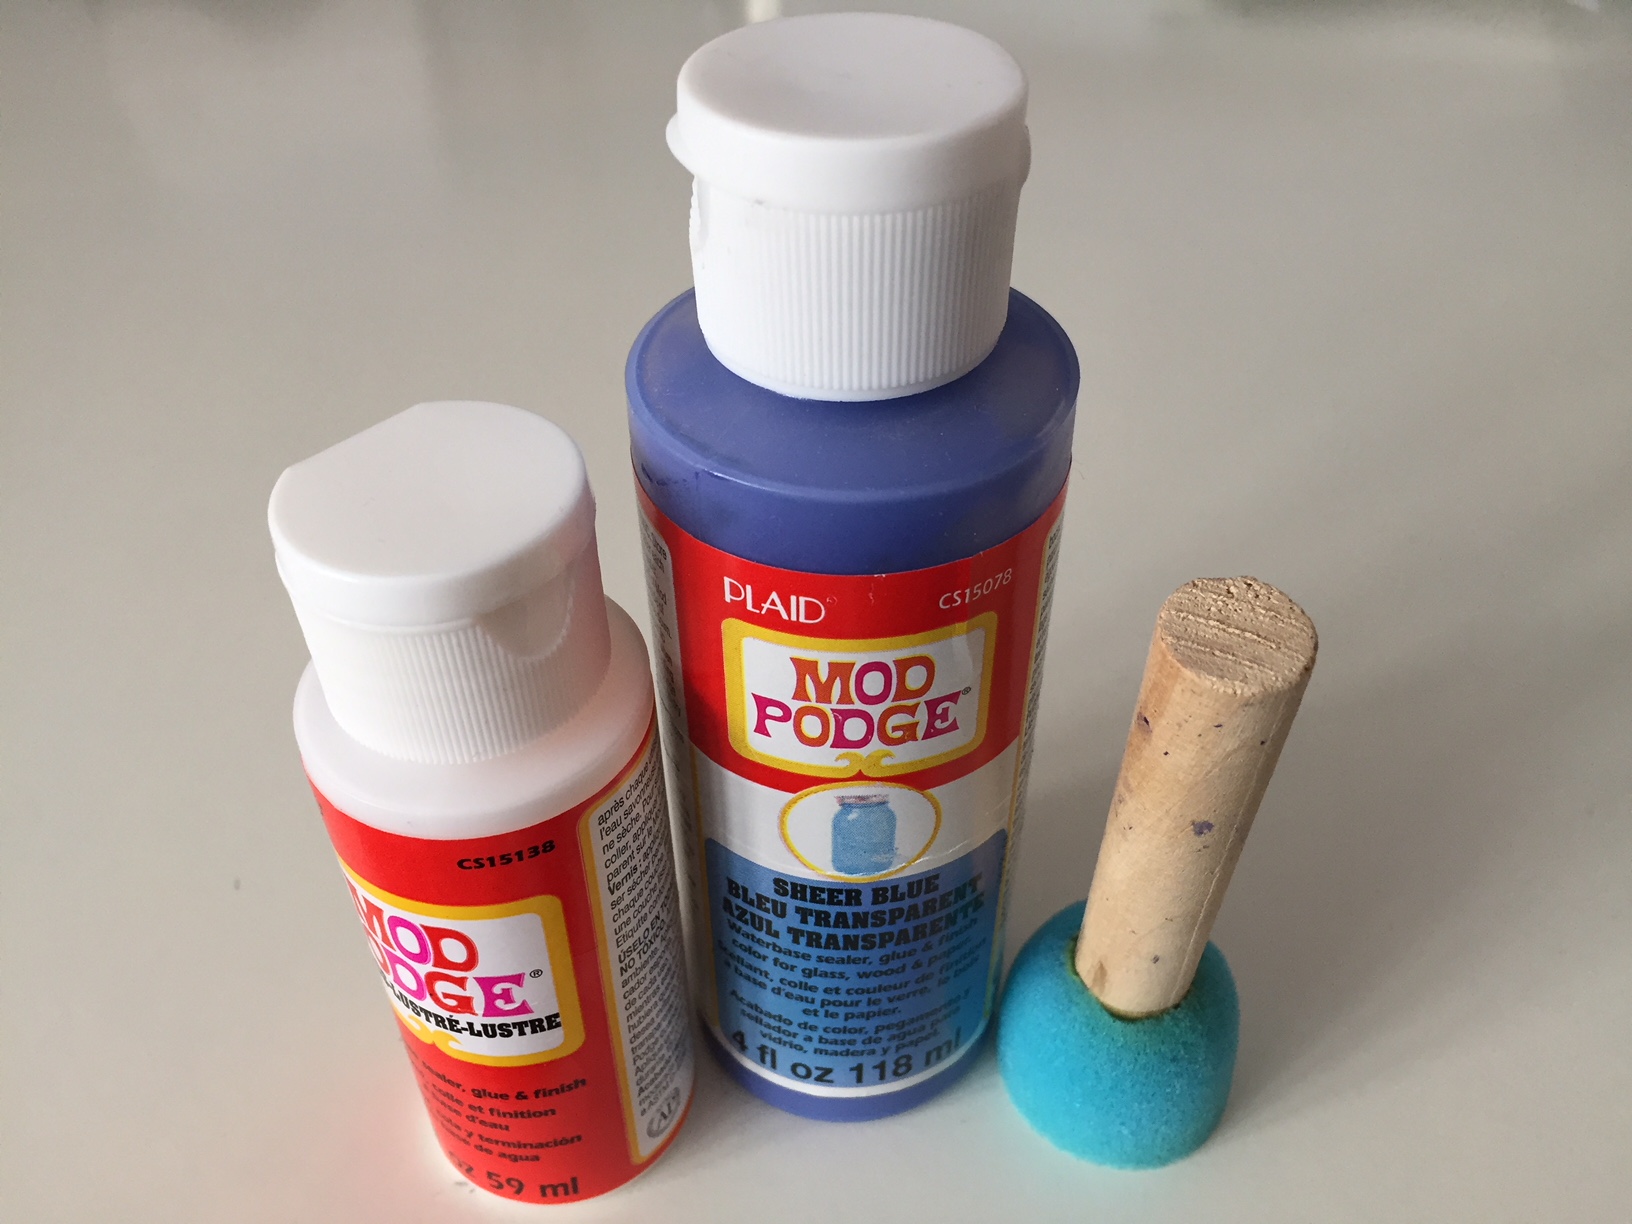
I used a few inexpensive supplies from a craft store:
I dabbed on the blue first (which dried a bit more purple than I had hoped, but thankfully I still like it.
Next, I dabbed on the white. Here, I freaked out a bit. I did NOT want it to be white. I wanted it clear. It was an exercise in patience waiting for it to dry.
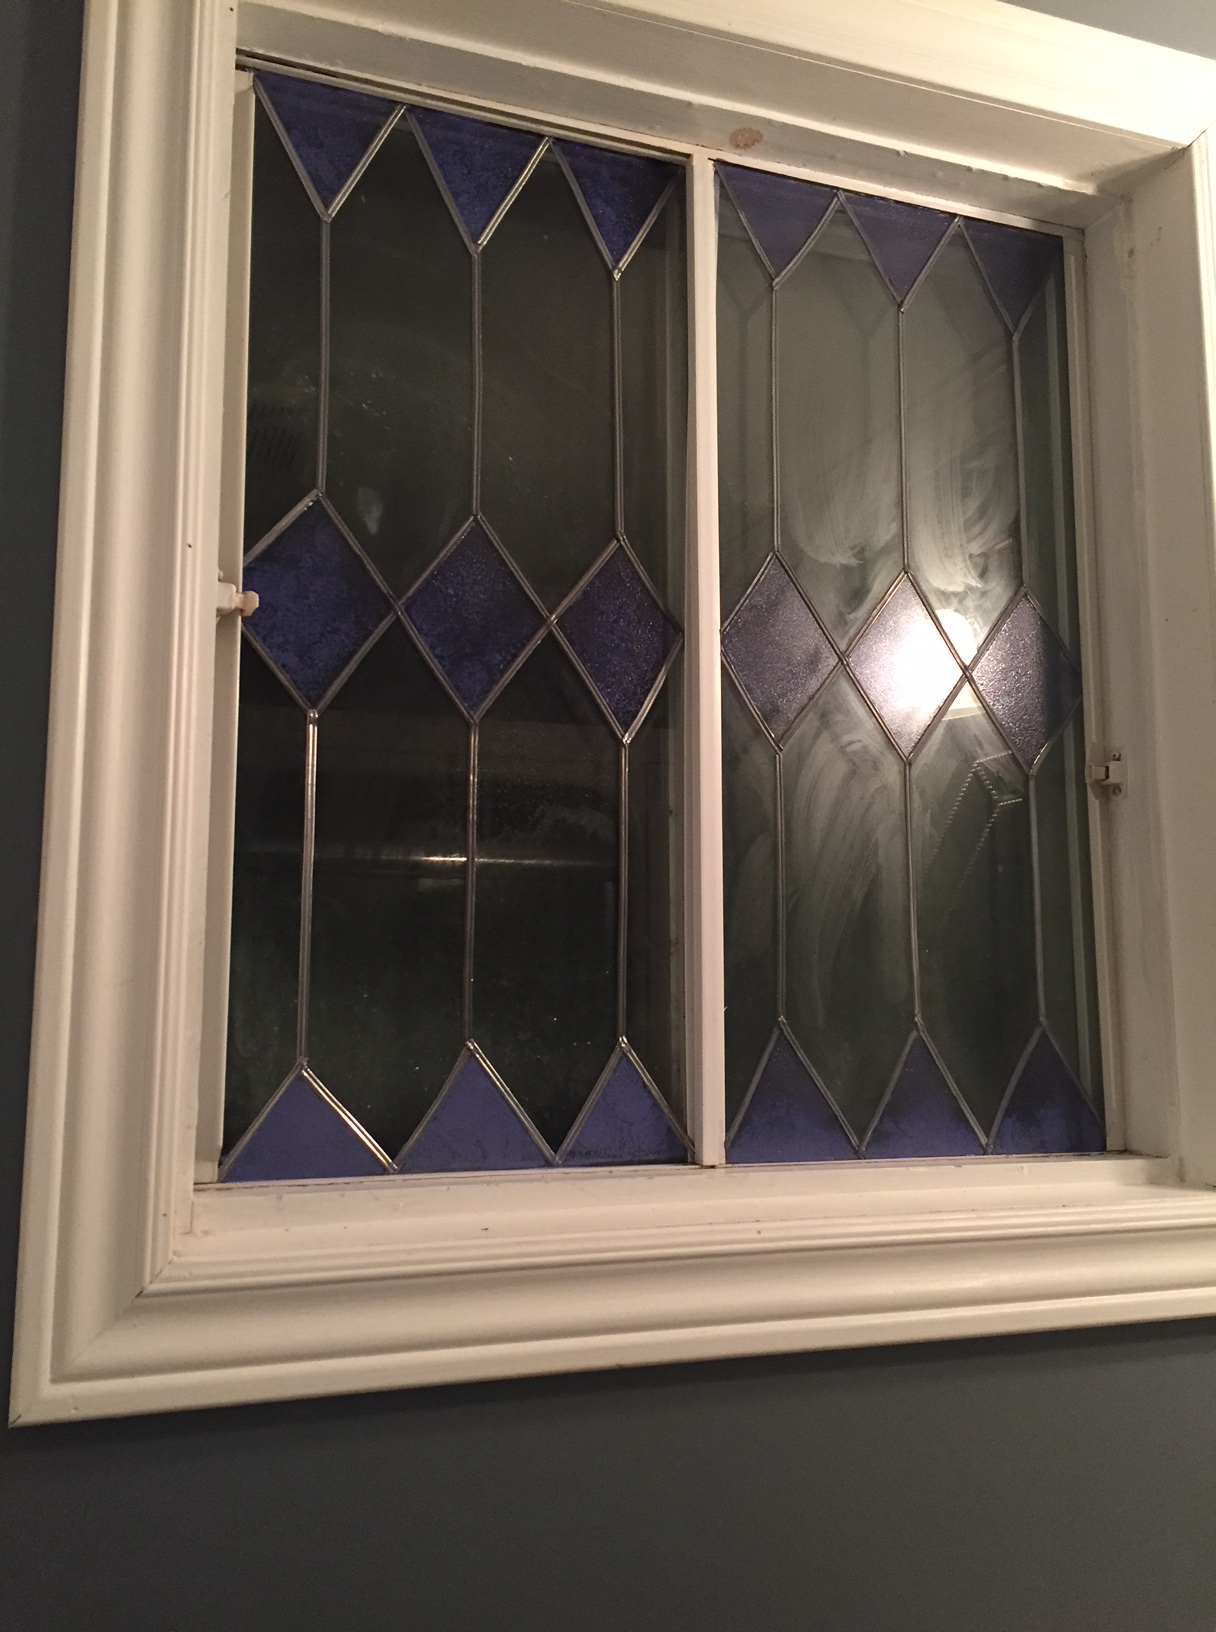
I am quite pleased with the results, and I love that all the light can shine in undisrupted by a curtain!
I have a huge weakness for leaded glass windows. I love the look. When I discovered this product I KNEW I had to try it out. And I had the PERFECT window.
This is our plain and boring kitchen window. Too new to replace. Too old to be pretty.
When we renovated our kitchen, I was unsure what sort of treatment I wanted. I’m not worried about privacy (since we look at a brick wall), but I didn’t want to lose light. As soon as I saw this I knew it was the window treatment for me. I ordered two packs of self adhesive lead strips and while I wanted for them to arrive, I started searching online for design templates. Of course, there was nothing ready made for my window size, just design ideas.
I cut newspaper to the size of one slider window and found the centre. Then, using my mad math skills, I measured out a cathedral pattern to fit my template. I taped it to the back side of the window.
This is the hard part. Peel and stick the lead strips. Remove the template and put it behind slider window number two and repeat. Seriously, that’s as hard as it gets.
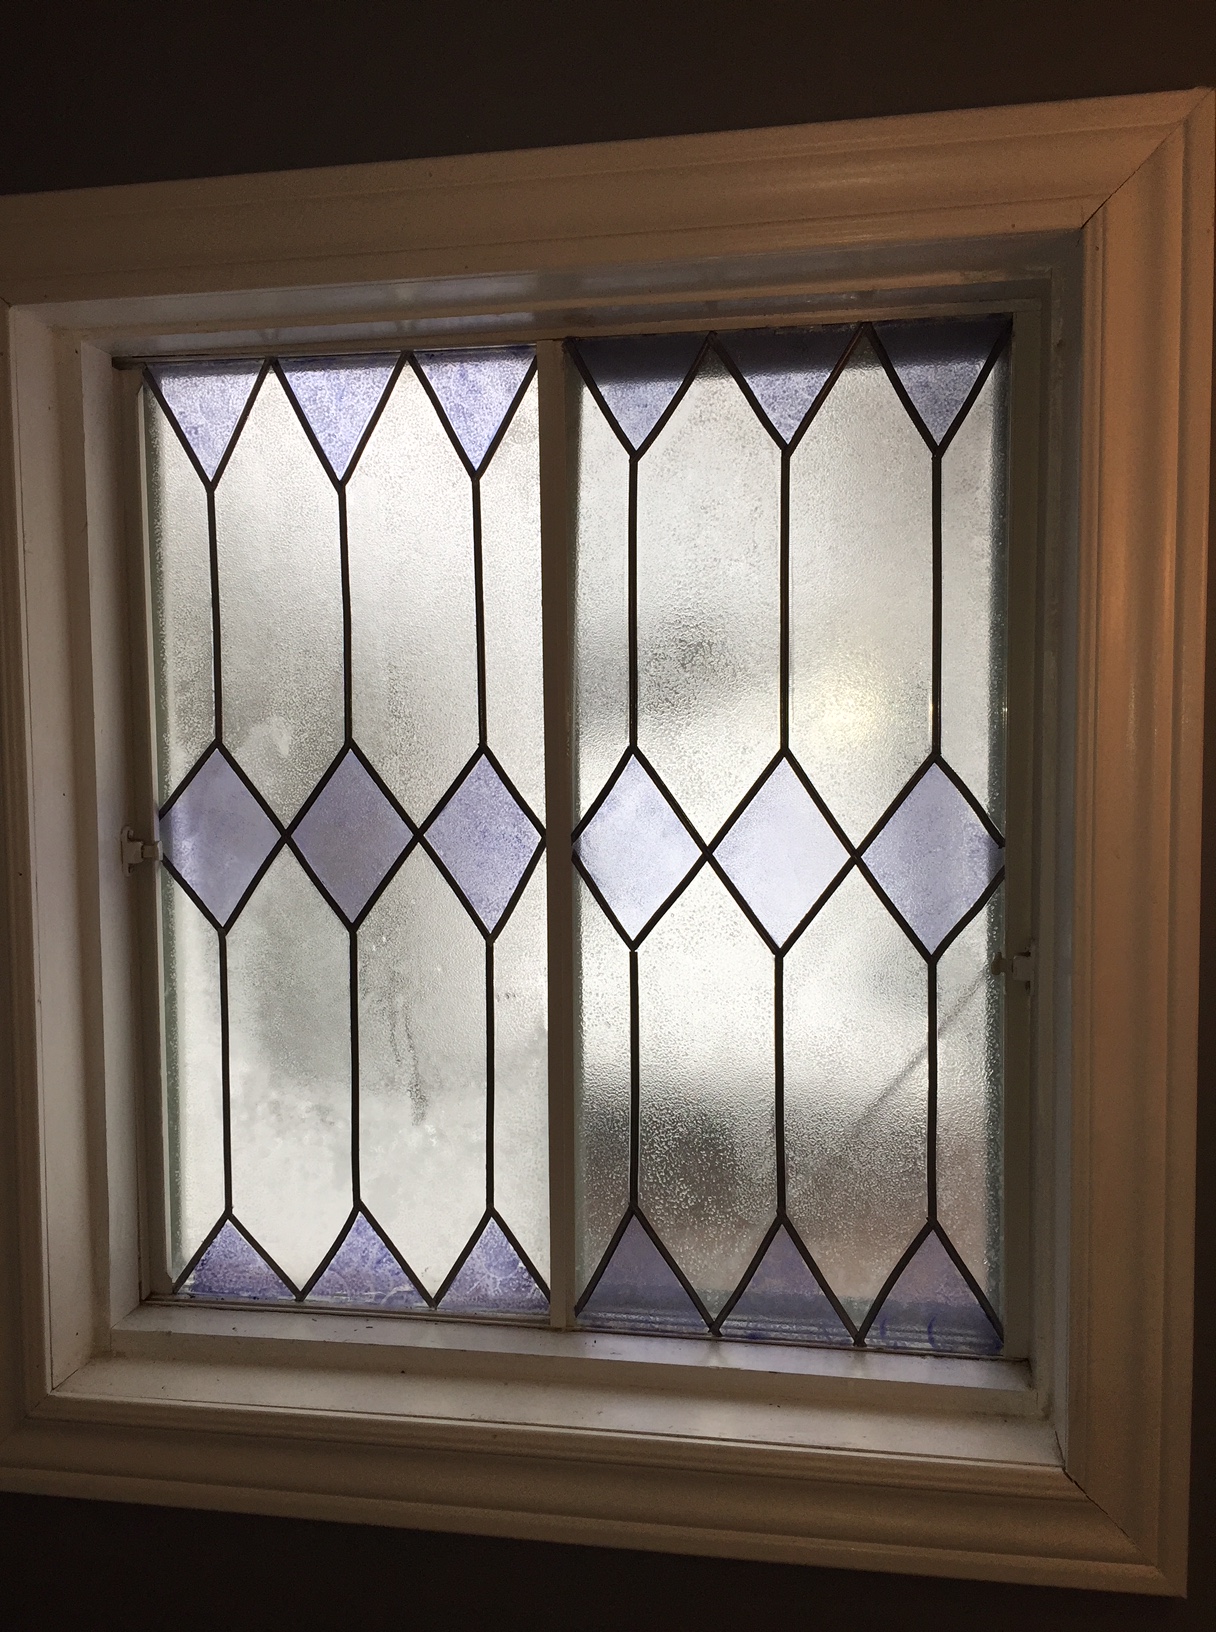
Up close
This updated older window is now one of my favourites!
It is an absolute delight to welcome Jenna Jenkins to Makeover Monday. The conflicted heroine from The Builder’s Reluctant Bride (releasing July 08, 2016 through Pelican Book Group), resides in the fictional town of Bayview, Michigan. The gifted renovator transforms discarded items into beautiful works of art. In addition to the projects she manages, she also writes a weekly renovation themed newspaper column that is under consideration for syndication. Today, she is talking about Petra’s hutch. Welcome, Jenna!
Thanks, Stacey! Let’s get right to it.
Petra needed a place for her home school textbooks and workbooks. She found this gorgeous hutch, but it didn’t suit her style preference.
She investigated options and decided to give it chalk-paint makeover. She disassembled the massive piece of furniture and painted it stunning white using a homemade chalk paint recipe.
She lightly sanded the edges to add that “antique” flare and kept the original hardware, soaking them in vinegar to clean them.
I love the result! As a woman passionate about reusing instead of buying new AND stretching every dollar, I declare this project is top shelf! Well done, Petra!
Stacey is busy writing her third novel, so I will host future Makeover Monday projects. If you’re not connected to Stacey on facebook or twitter – hop over there and click “like” or “follow”! When my story is released in July, Stacey is hosting a MONTH of giveaways. You won’t want to miss the great, reinvented, you’re-gonna-want-it prize that I made especially for her contest. The info will be shared via social media and this website. You can also find links to her twitter and facebook accounts on the right side news feed of Glorious Surrender’s home screen.
When my mismatched office came together, I knew I would do something special with it – I just didn’t know what. While I worked on my desk, I slapped the leftover chalk paint on the dresser. It was midnight. I only had a bit left. And I really didn’t care too much about the quality of my work. I did no prep. Absolutely none. I was tired, but didn’t want to waste the homemade chalk paint that wouldn’t keep until morning.
It remained white for weeks until I was inspired by a quote in Christine Hoover’s book, The Church Planting Wife. I knew I needed that quote somewhere in my office.
“It’s not about what you do but who you are becoming in the process. We certainly go after the dreams God puts in our hearts, but ultimately, none of it matters compared to the journey, that maturation process God is taking us through—that we may become more and more like Jesus.”
I played around with the quote trying different fonts and text sizes. I printed it out and cut and taped it on the dresser to see if it would fit.
Once I knew where I wanted to place the words, I used a level to mark the beginning and end of each phrase and drew a straight line in pencil.
Next I saved the word document as a PDF, opened it as a jpg, horizontally flipped it (like a mirror image) then printed it on wax paper.
To flip the text: Open the .pdf document you wish to “flip.” From the menu bar select File->Export. In the format drop down menu select JPEG. Save the file. If you now open that file you will be able to flip both horizontally and vertically under the tools tab/edit
To feed the wax paper through the printer: Tape a piece of wax paper cut to printer paper size a 1/4 inch from the top of a printer page. Feed it through the printer so the ink prints on the wax paper.
Placing to wax paper ink side down. CAREFULLY rub the ink onto the drawer front. Do NOT wet the drawer (the ink will smear) and do not move the paper (the ink will smear). You should be able to see your pencil line guide through the wax paper. I attached the knobs to ensure I liked it so far.
Let the ink dry overnight. Using a small paintbrush and black paint, paint over the ink transfer ensuring to “paint inside the ink-lines”
After the paint dries, wash the pencil marks off. A Mr. Clean magic eraser works great. Lightly sand over the words to distress, then sand the edges of the drawers and the base unit.
Attach the handles and wipe the dust off. You’re done! It involves quite a few steps, but it is well worth the result.


 Stacey is busy writing her third novel, so I will host future Makeover Monday projects. If you’re not connected to Stacey on


